
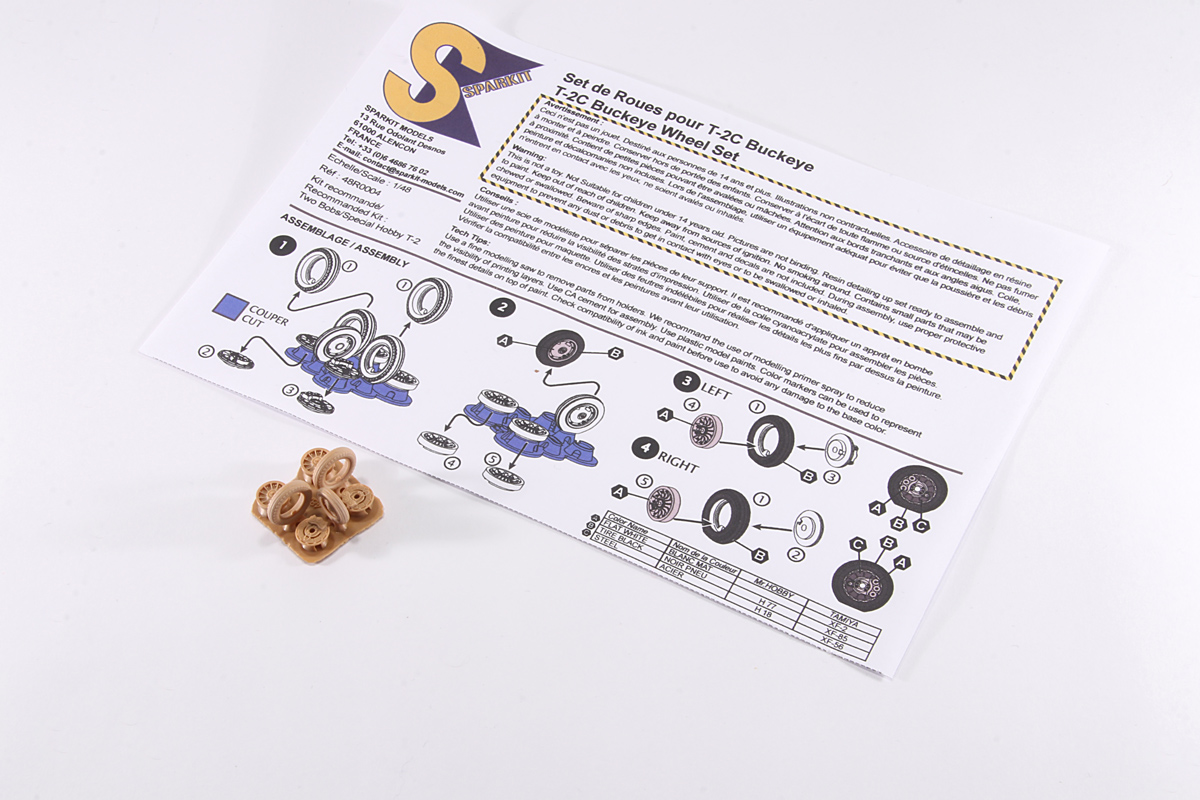
Unpacking and Preparation :
Once you get your package, we advise that you check its content and read instructions to get familiar with each part and their assembly process.
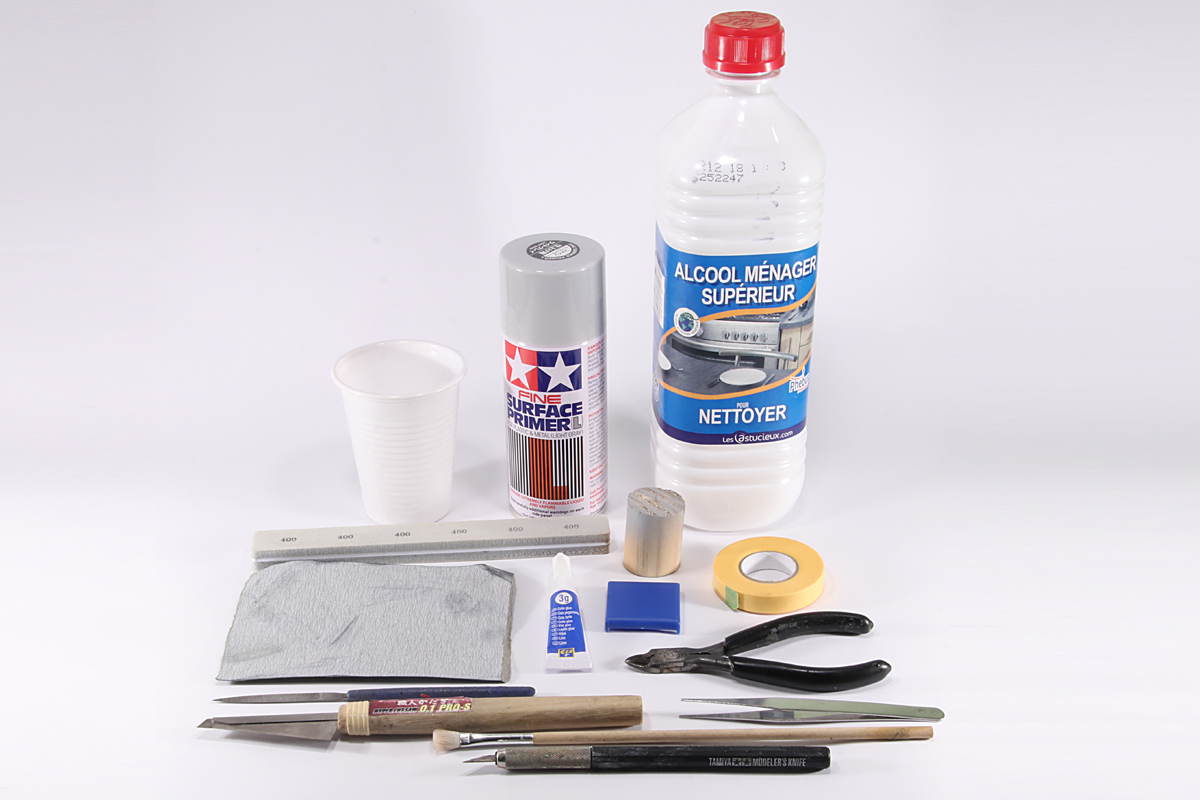
Then, here is a list of tools and equipment that will be usefull :
- a fine modeling saw,
- side cutters,
- a modeling file,
- sanding paper,
- rubbing alcohol,
- a flat brush,
- a modeling knife,
- a bloc of wood or plastic,
- CA cement,
- tweezers,
- primer spray,
- a glass of water,
- masking tape,
- absorbent paper,
Parts separation :
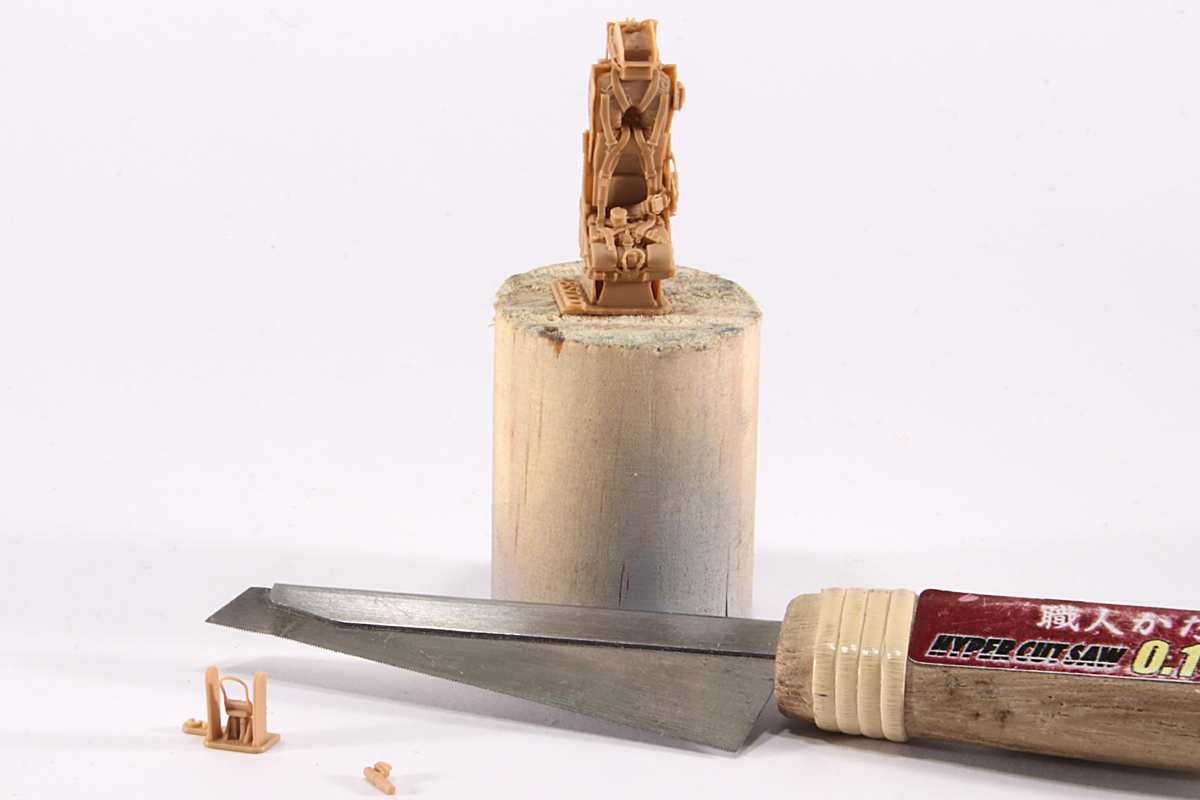
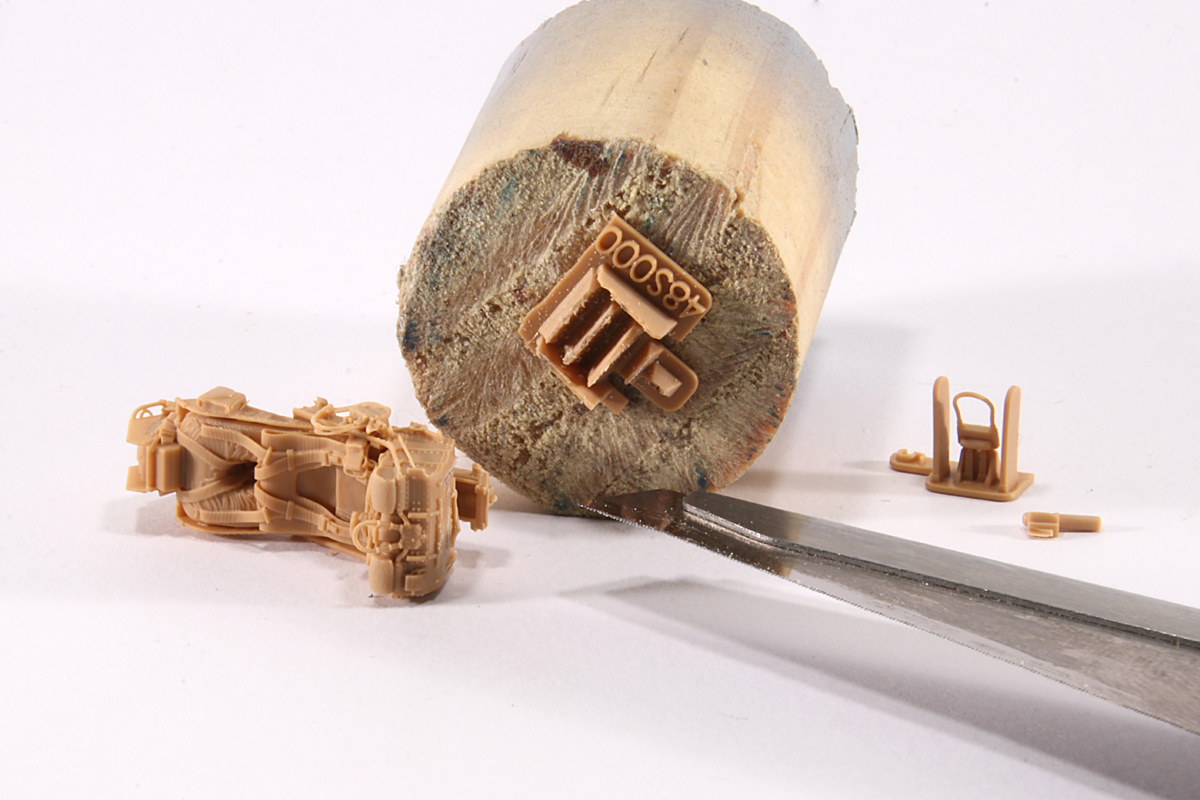
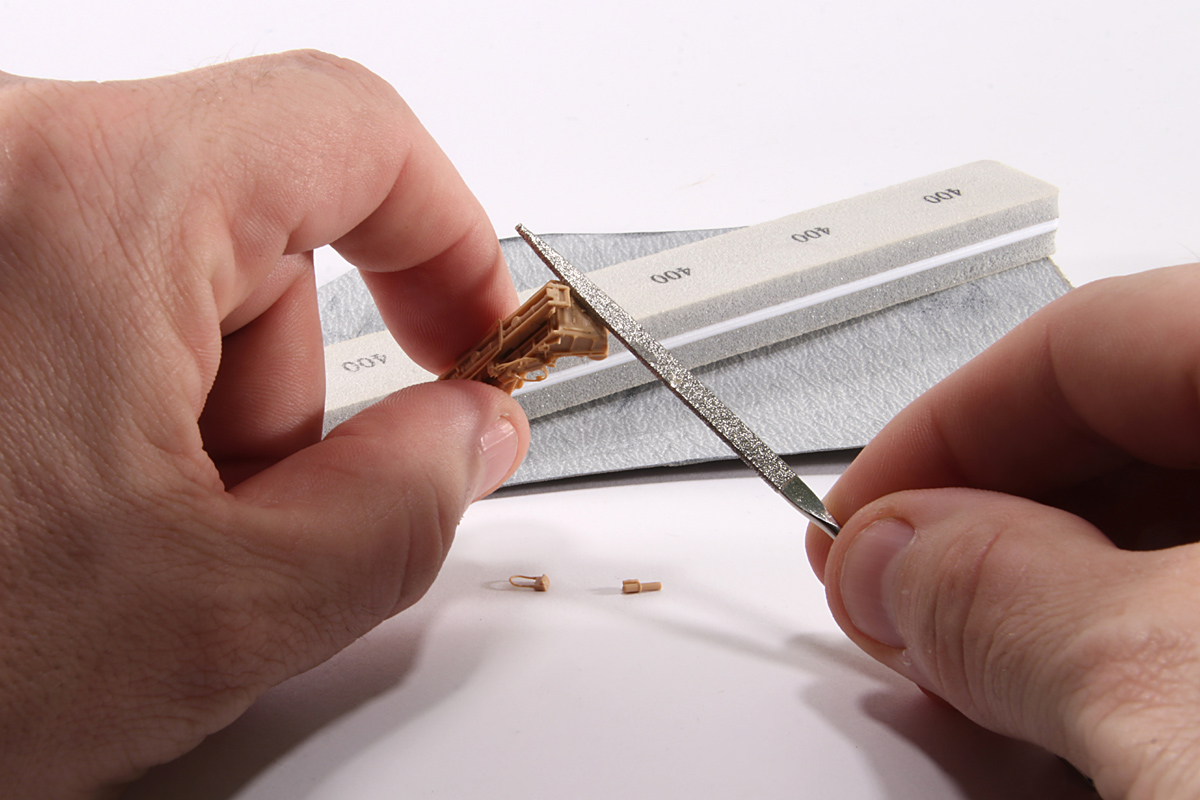
Some of our parts are quite small and delicate and may be damaged when handled to cut them off their support. To avoid this problem, take a block of wood or plastic and glue it on parts support undersurface using CA cement on support.
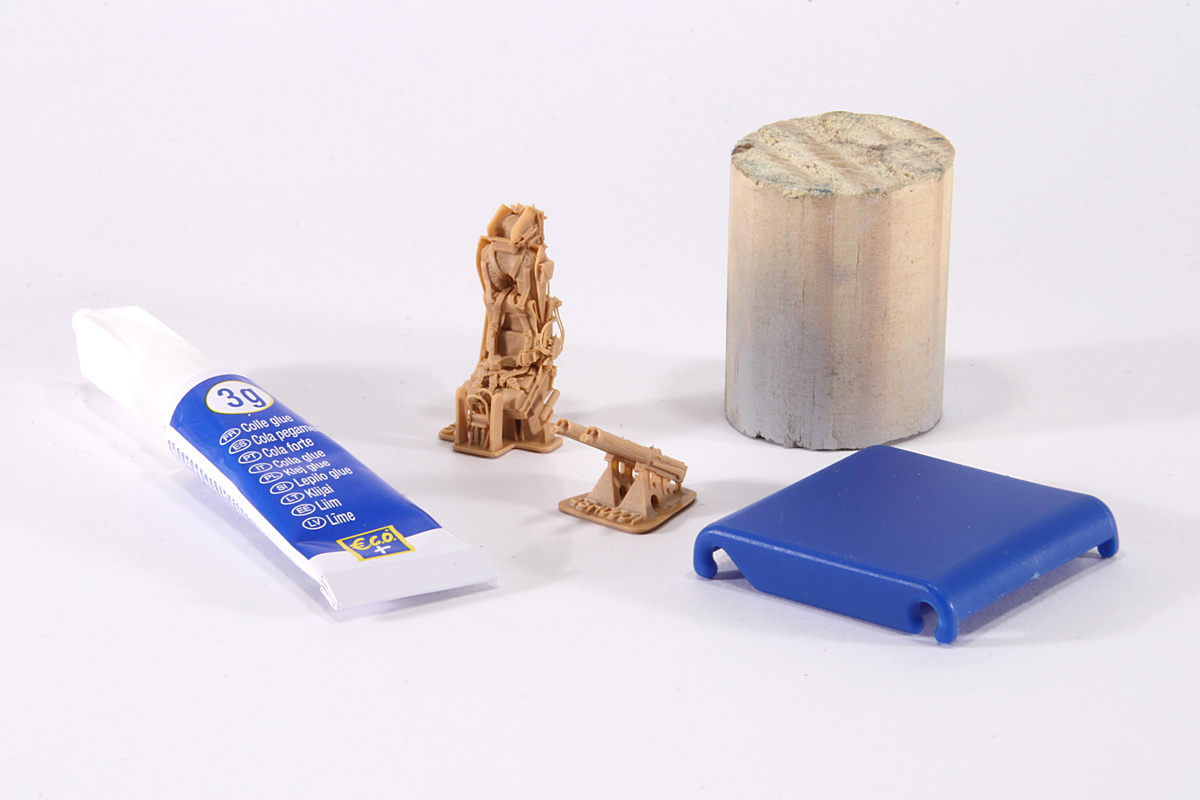
Use a block large enought to get support undersurface fully in contact with it and to have a good handling. Then, let cement cure fully. It is important that parts dont come off easily from the block. If there are several parts attached to one support, you should start by seperate them from one another by cutting support base using side cutters or a modeling knife.
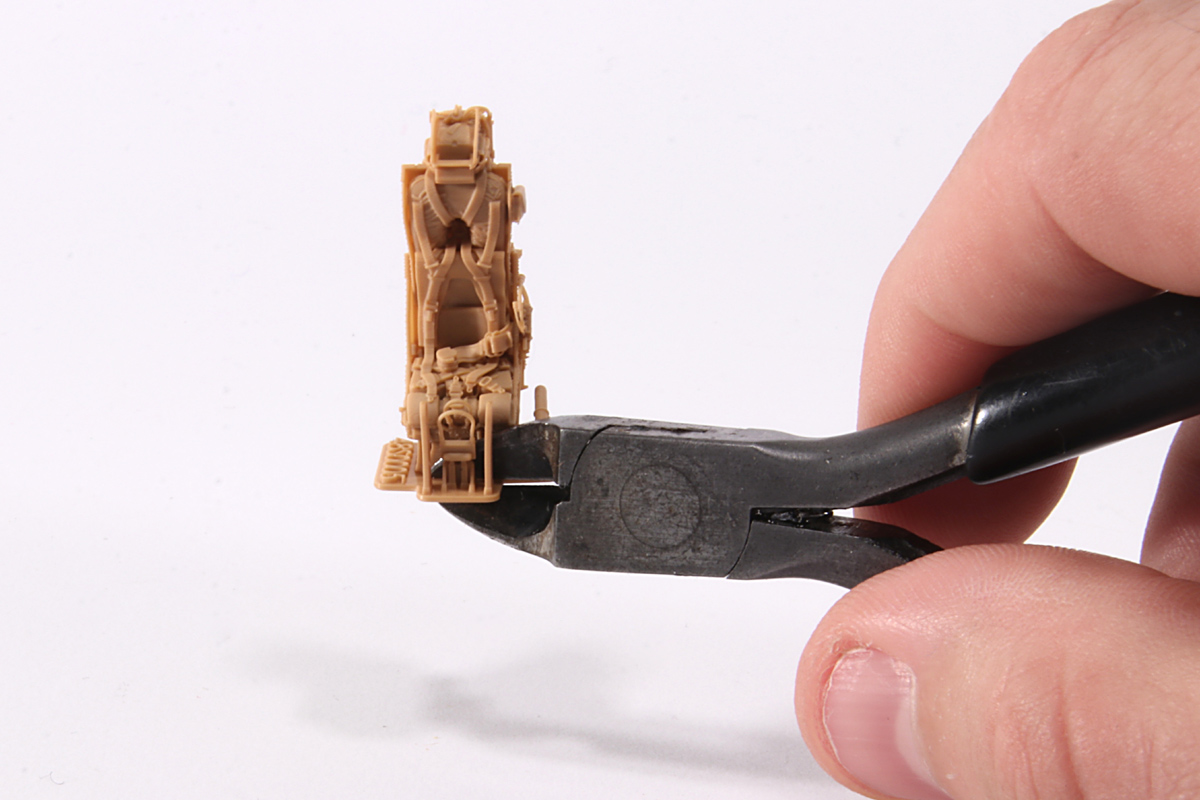
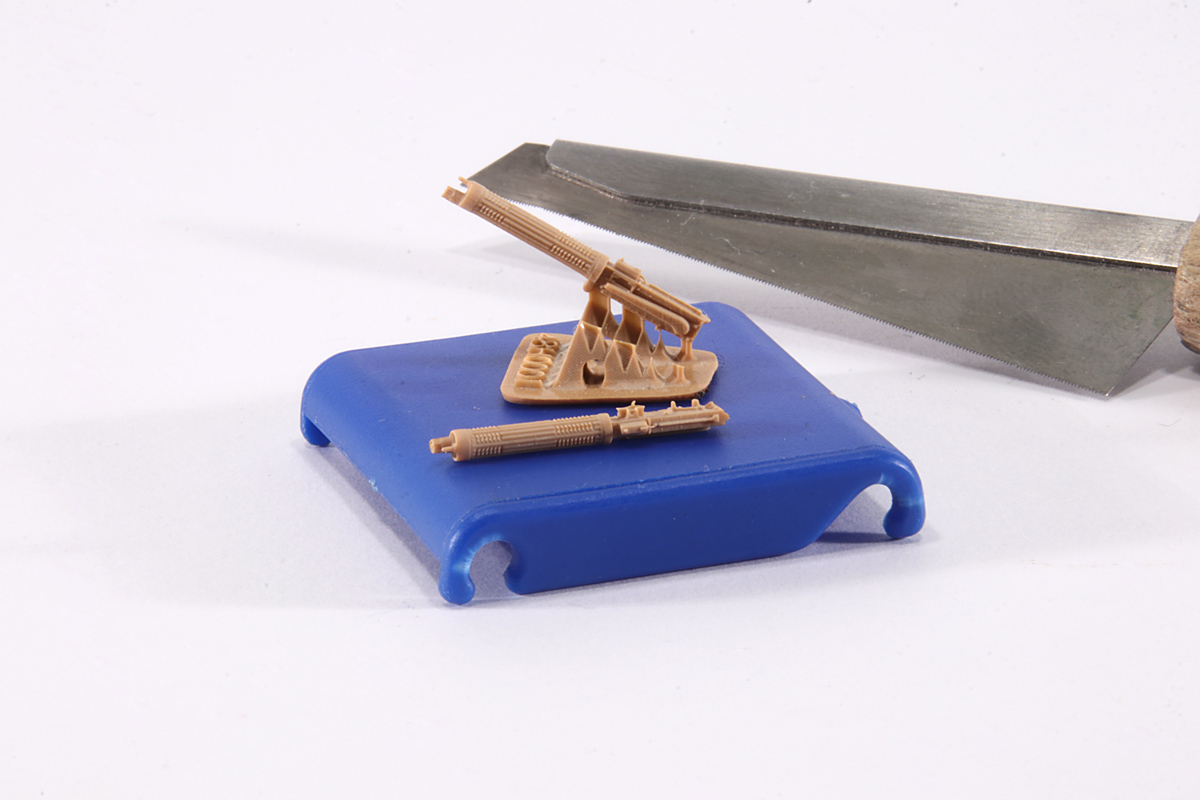
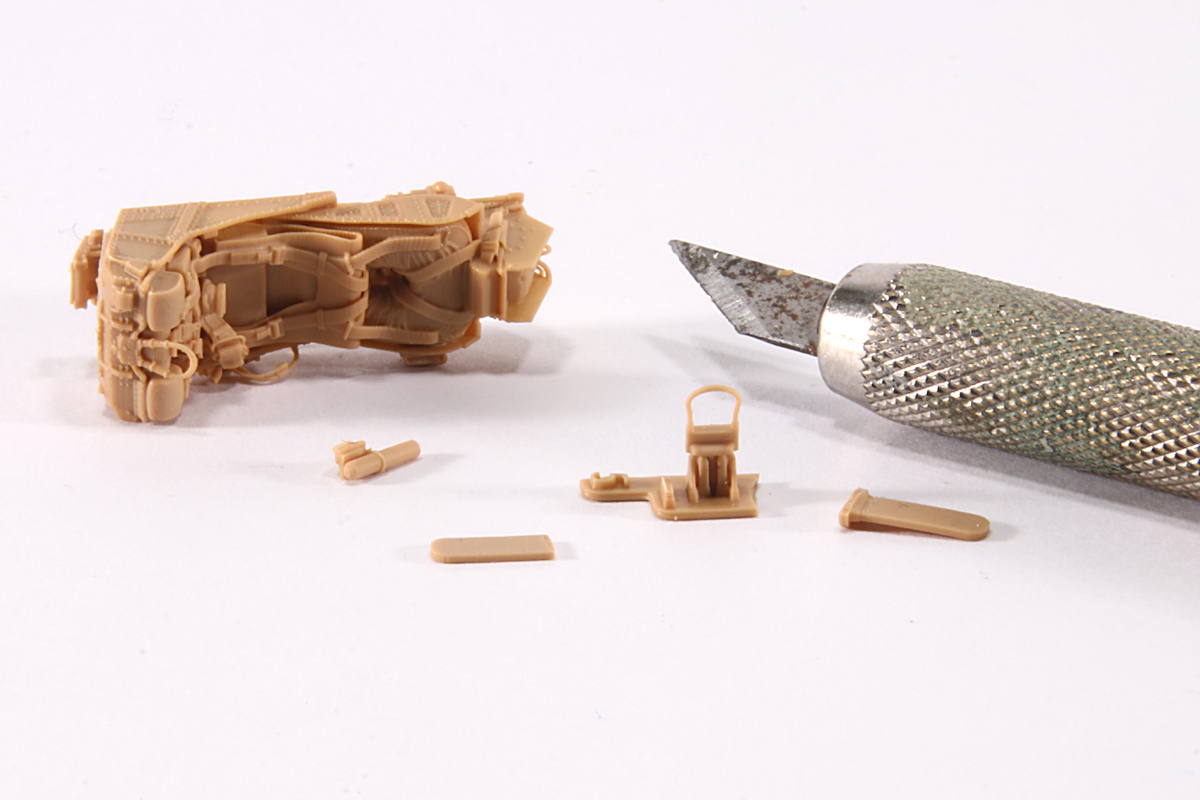
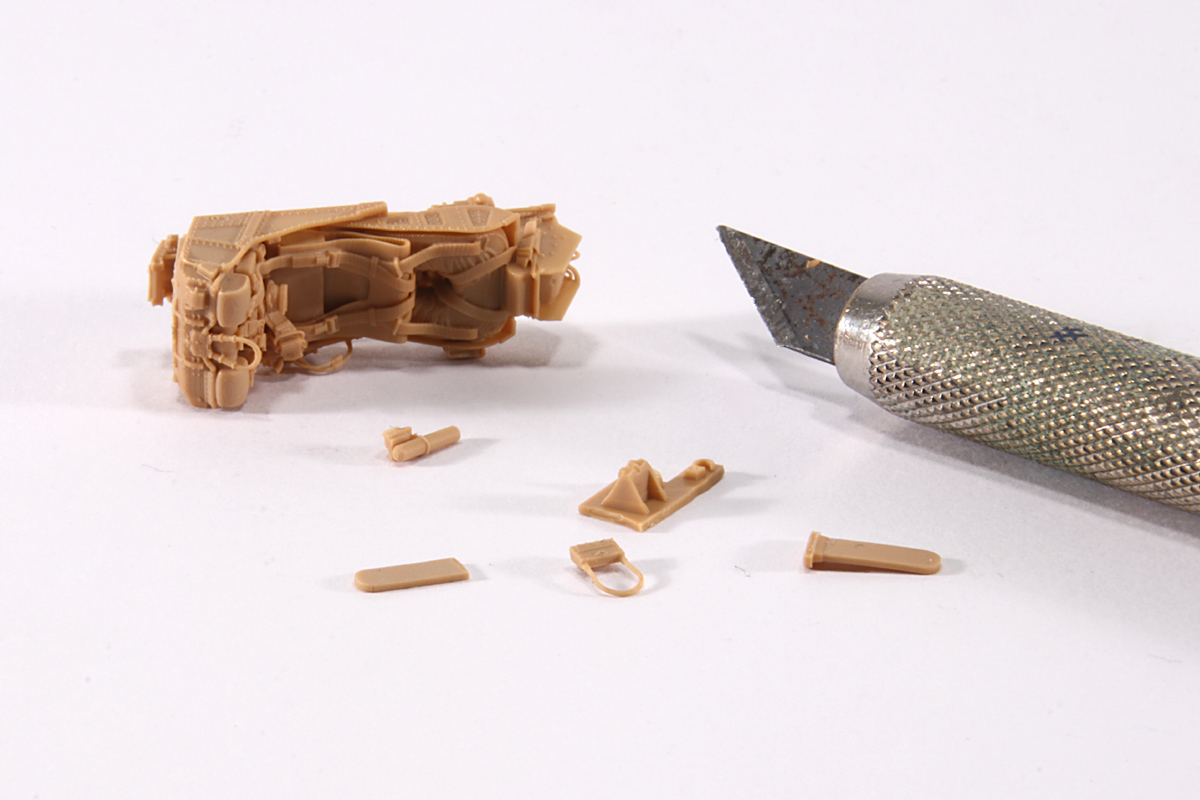
Once that the parts are attached to the bloc, use a fine modeling saw to cut attachments one by one. Make sure not to cut them to close to the parts to prevent any damage.
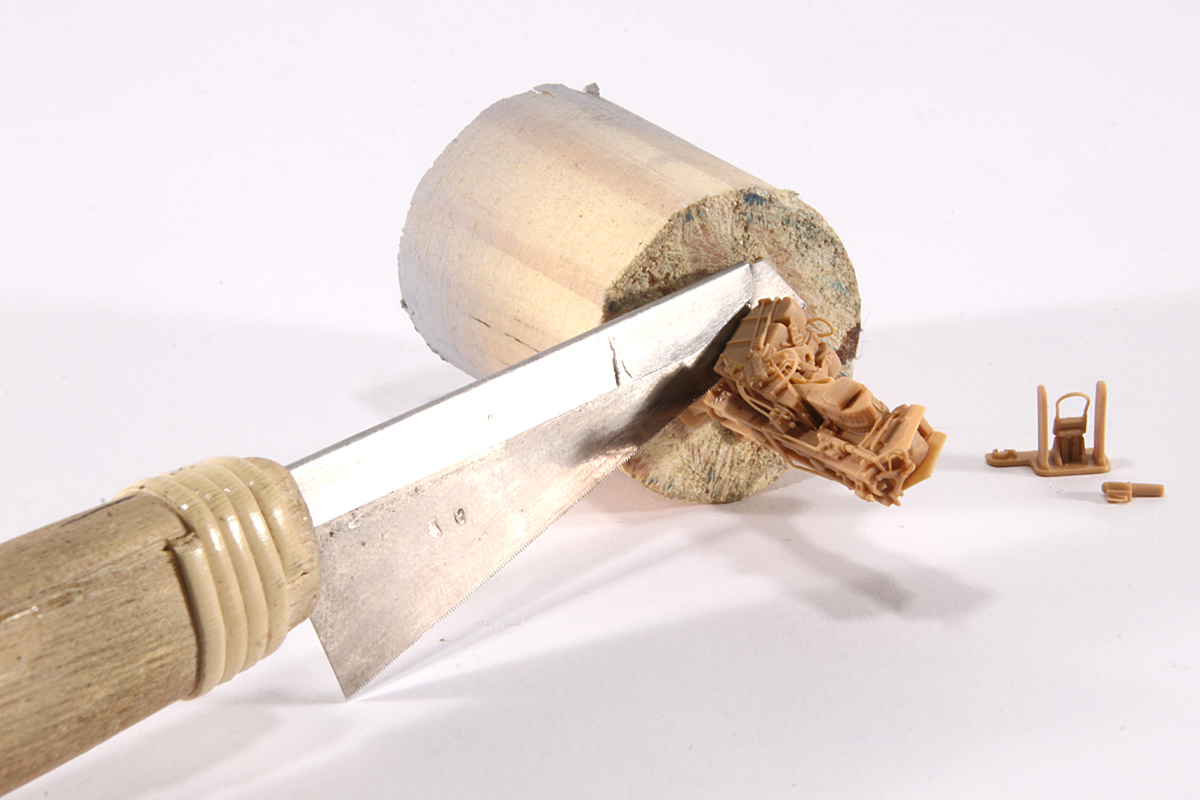
Some one-length type attachement can be cut using a different technic. For smallest parts, they can be cut off using a modeling knife. Be carefull that the part dont fly away.
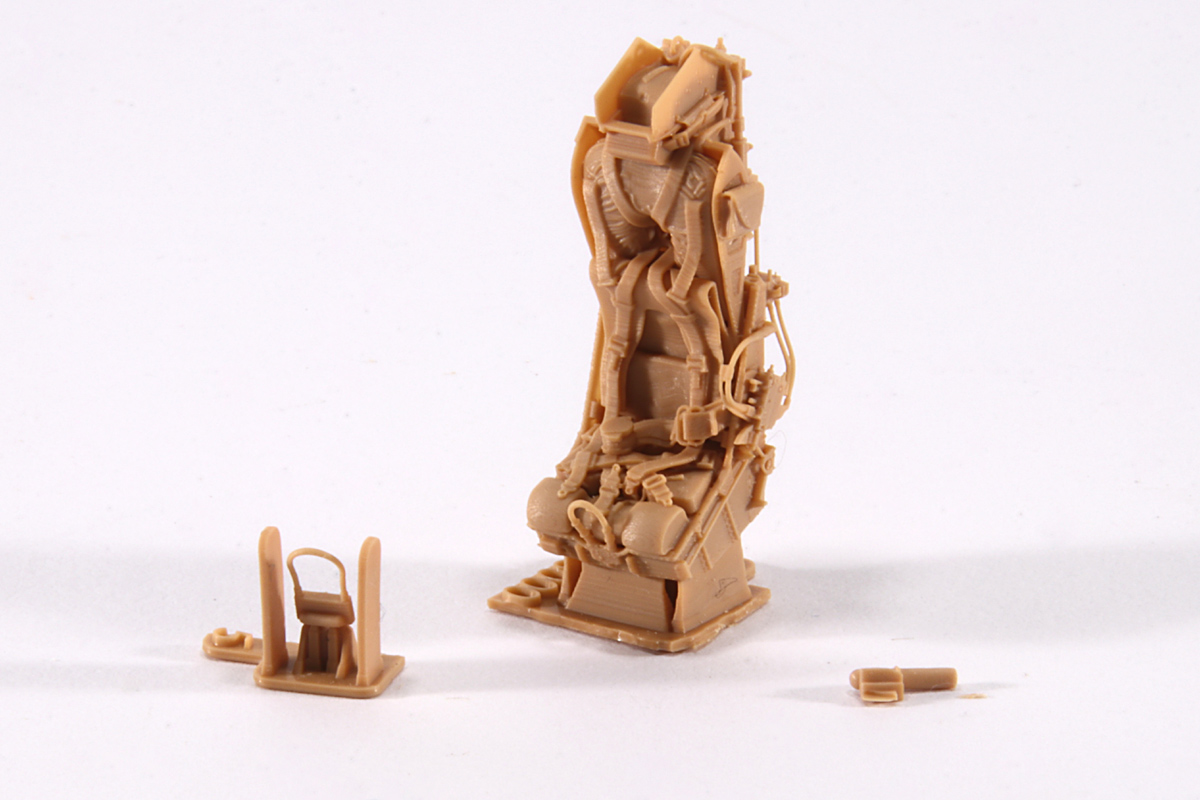
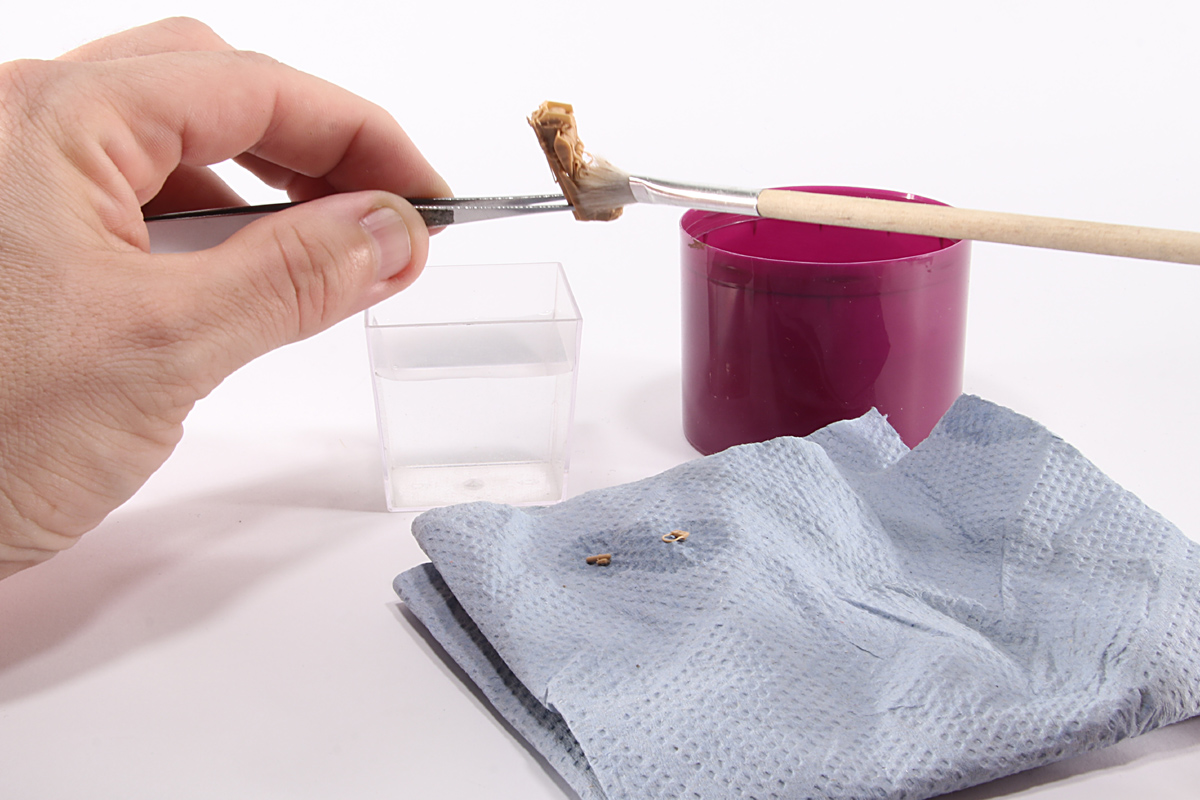
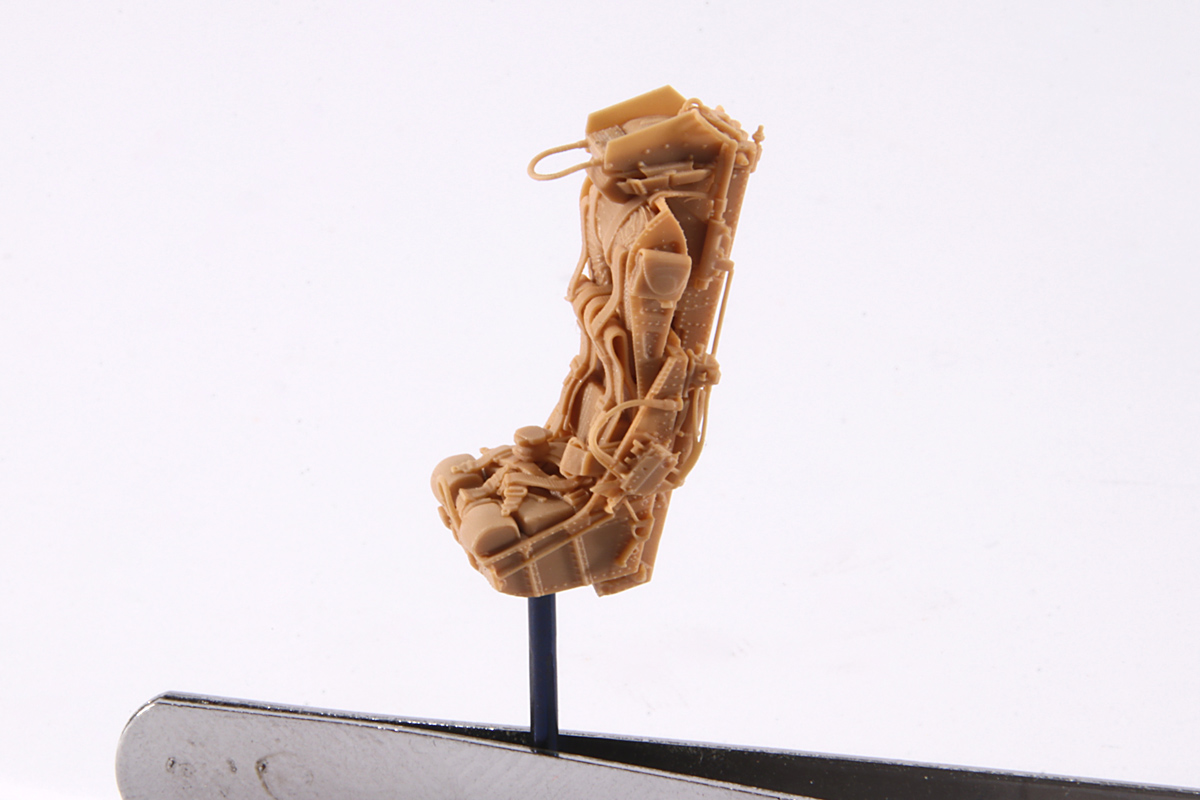
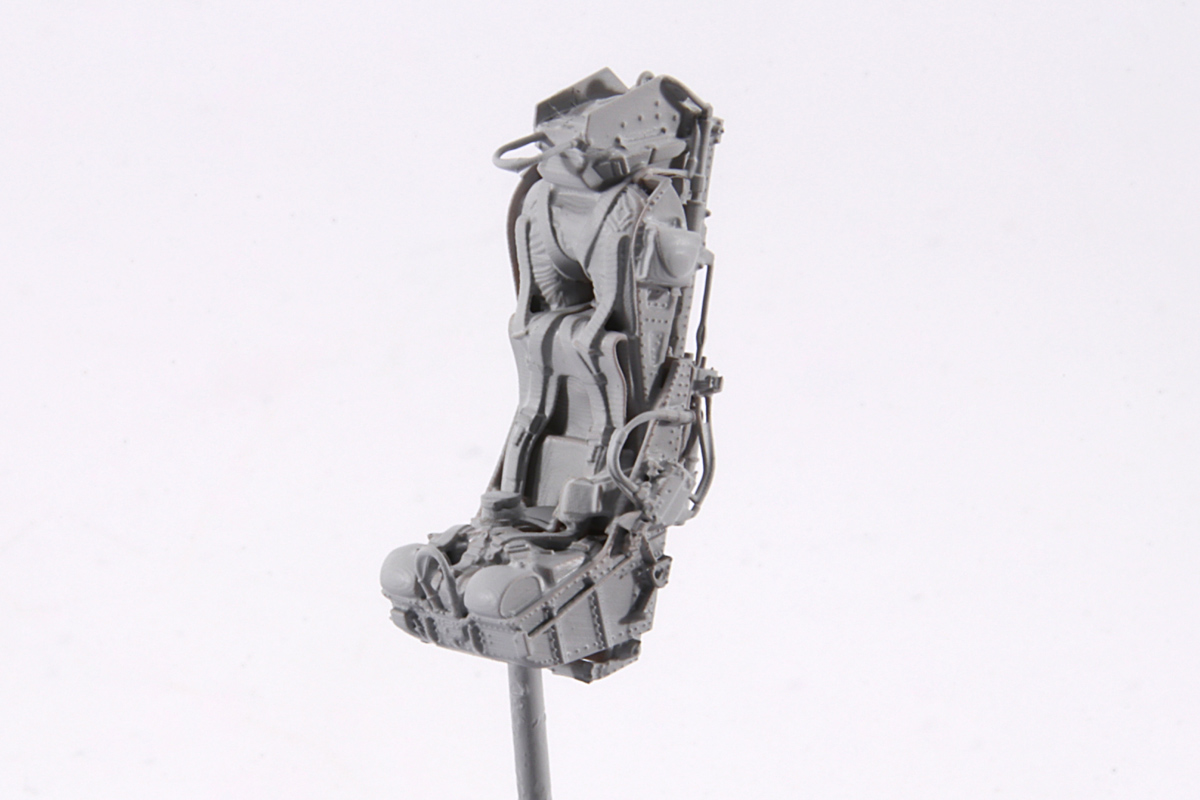
For larger parts, bending gently support in a direction perpendicular to it will make the part seperate nicely. If support is made of several length in one row tied as one piece by its base, then, start to seperate each piece by cuting base before bending supports one at a time. Once all supports have been removed, clean the parts by placing it into rubbing alcohol and gently rub surfaces with a flat brush. Make sure not to damage the parts. Then, dip the parts into clear water to remove any alcohol residue and place them on absorbent paper to let them dry.
Next step is to remove what remains of attachments from the parts using a modeling file and sandpaper. Parts are now ready for assembly.
Assemby :
First, start to dry fit parts to check adjustments. Then fit main parts to the kits they are meant for before attaching smallest parts to avoid any damage. Use CA cement to attach parts. Use tweezers to handle smallest parts.
Painting :
Before painting, we recommand to apply a layer of primer. Primer will ensure better adhesion of paint to the surface and will also fill the very thin grooves resulting from 3D-printing process. Let primer dry fully.
If you feel that there is still somme imperfection, spray one more layer or use the following procedure to get a smooth surface. First, cut pieces of masking tape and put them above the small protruding surface details to protect them. Then use some sandpaper to smooth down surface. Last, take off the masking tape and spray a last coat of primer. When primer had fully dried you can apply paint. You can use any type of plastic modeling paint. There will be no interaction between resin and paint. You can also apply washes and drybrushing to make details stick out.